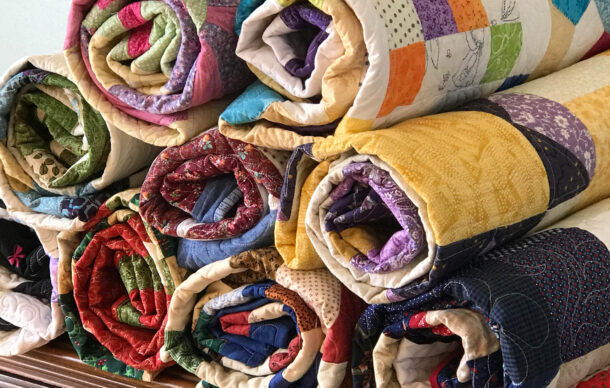
Spinning Attic Windows & Shades of Spring Blocks and Layout!
Now that you have all your pieces cut out and ready, let’s get our blocks pieced together and get the center of our quilt(s) sewn as well!
- Spinning Attic Windows Block:
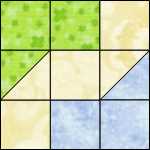
Each block for the Spinning Attic Windows is pieced the same. The block is a simple 9-patch which includes a couple HST’s within each block.
Make 16 blocks using 4.5″ squares as follows:
Row One = Medium – Medium – Light; Row Two = Med/Light HST – Light – Light/Dark HST; Row Three = Light – Dark – Dark 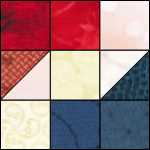
The Spinning Attic Windows blocks will look like the photos here. Of course, you will substitute “your color choices” for the Lights, Mediums and Dark’s which I have chosen. My choices shown in the photo are: Red scraps for Mediums; Cream scraps for Lights; Navy scraps for Dark’s.
Now, let’s lay out our Spinning Attic Windows quilt in Rows . We will “spin” each block in the row to create the Spinning Attic Windows Layout! The photo here shows how each block is turned or “spun” to create each row.
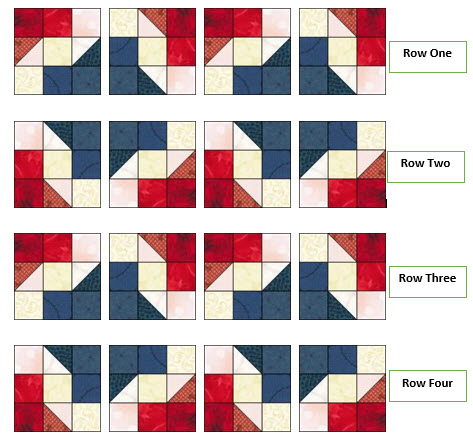
Sew your blocks into the Four Rows; then sew those rows together to complete the center of your quilt top. As you can see the center of this quilt goes together very quickly. The next Step I’ll be posting in a day or two will be Step Four: Adding the borders. (There will be two different border options available for you to choose!)
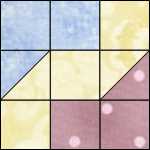
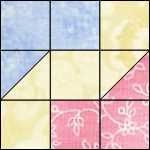
2. Shades of Spring Quilt Block:
The creation of “each” block in the Shades of Spring quilt is identical to that of the Spinning Attic Windows. However, there is a twofold difference: 1) There are more color variations in these blocks; and 2) the layout of each block with the row is different.
You will make 16 blocks for this quilt center using 4.5″ squares as follows :
Make the 9-patch Blocks as follows: (SUBSTITUTE YOUR COLOR CHOICES)
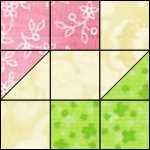
Qty.(4) Pink & Green 9-patch Blocks:
Row One: Pink – Pink – Light; Row Two: Pink/Lt HST – Light – Lt/Green HST; Row Three: Light – Green – Green
Qty (4) Green & Blue 9-patch Blocks:
Row One: Green – Green- Light; Row Two: Green/Lt HST – Light – Lt/Blue HST; Row Three: Light – Blue- Blue
 Qty (3) Blue & Lavender 9-patch Blocks:
Row One: Blue – Blue – Light; Row Two: Blue/Lt HST – Light – Lt/Lavender HST; Row Three: Light – Lavender – Lavender
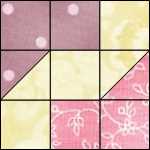 Qty (4) Lavender & Pink 9–patch Blocks:
Row One: Lavender – Lavender – Light; Row Two: Lavender/Lt HST – Light – Lt/Pink HST; Row Three: Light – Pink- Pink
 Qty (1) Blue & Pink 9-patch Block:
Row One: Blue – Blue – Light; Row Two: Blue/Lt HST – Light – Lt/Pink HST; Row Three: Light – Pink- Pink
Now that your (16) 9-patch Blocks are pieced, you can begin laying out the quilt center of the Shades of Spring top as follows:
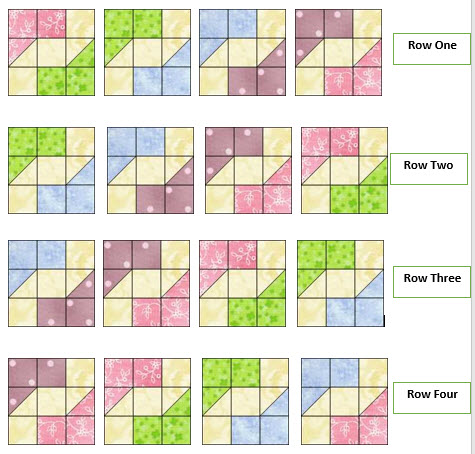
For the Shades of Spring quilt, place all of your blocks next to you as you work with them on your design wall; or, place them on the floor next to your machine as you lay the blocks out in rows.
Simply place the appropriate “color variation block” in each row in the “specific direction” in which you see it placed here for Rows One, Two, Three and Four.
As you set, or place, your blocks within each row, the “colored” portion of each block will always be located in the upper left and in the lower right corners of each block. The Light part of the blocks will end up running in “diagonal rows” between the “colored rows!” …Kind of like rows of a flower garden!
With Scrappy quilts, if you should run out of a particular color fabric, other fabrics can simply be used in their place! Instead of only using four colors for your blocks, maybe you would like your Shades of Spring ‘garden rows” to be completely scrappy! You could certainly do that as well! Have FUN with this design!
Once you’ve sewn your blocks into rows, then sew the rows together to complete the Quilt Center of the Shades of Spring quilt!
As I mentioned at the beginning of this post, the next Step we will be creating borders. There will be two border options for you to use. Join in on the fun! Happy Quilting!
Lori