
Flange Quilt Binding is a great method for binding a quilt! Using Flange binding allows you to sew the binding on the quilt entirely by machine! It saves so much time and the finished look is beautiful!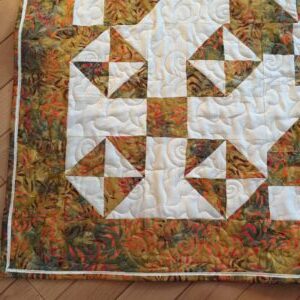
To make Flange quilt binding, you will be sewing two very long pieces of contrasting fabric together. The binding fabric will always be 1/4″ narrower than the flange fabric.
The measurements that I prefer to use for each of those fabrics are as follows: Binding fabric 1-1/4″ wide and Flange fabric 1-1/2″ wide.
If you prefer “wider” bindings, then you could use the following measurements: Binding fabric 1-1/2″ wide and Flange fabric 1-3/4″ wide.
Here are the Steps involved in making Flange Quilt Binding:
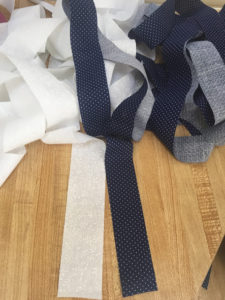
- Determine which two contrasting fabrics you want to use for your binding. Then decide which fabric will be the ‘binding’ and which fabric will be the ‘flange.’ In the photo below I have chosen the Navy fabric to be my binding fabric and the White fabric to be my flange fabric. I cut the navy binding fabric 1-1/4″ wide and I cut enough WOF (Width of Fabric) strips to obtain the length of the perimeter of my quilt, plus 10″ for corners and securing ends of binding. The white flange fabric was cut 1-1/2″ wide by WOF strips, times the length needed to obtain the perimeter of my quilt plus 10″ also. (This quilt required 208″ of binding length, plus 10″ ) .

2. Next, I sewed the WOF navy binding pieces together to make one very long strip, and I did the same for the WOF white flange pieces. Once they were pieced in two long strips, I pressed them.
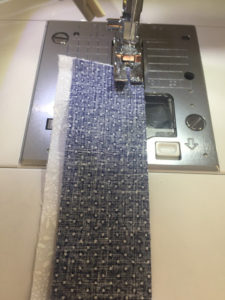
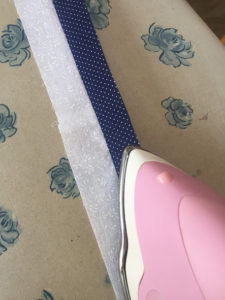
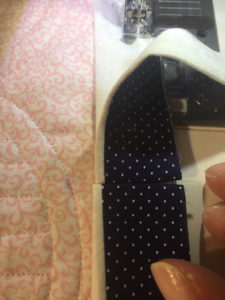
3. The next step is to sew the two long pieces together ‘lengthwise’ to create the Flange binding. Notice in the photo below that the white fabric extends 1/4″ beyond the navy fabric.
4. Press the Flange binding open with the seam allowance toward the ‘binding’ side. (This will help the flange to lay nicely when finished in the binding.)
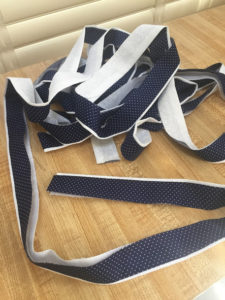
5. Then, Press WRONG SIDES TOGETHER, making sure the raw edges match perfectly so the ‘flange’ is even. Notice (in the photo below) the white flange that is created once this pressing has been done. The photo on the right is my pile of flange binding all ready to attach to the quilt!

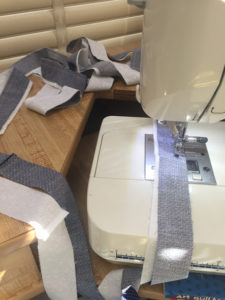
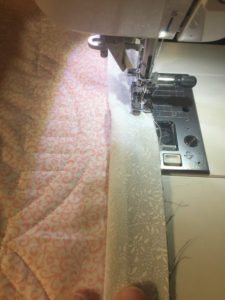
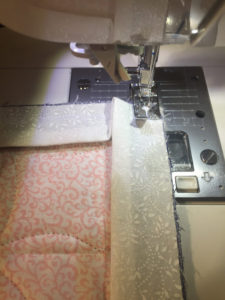
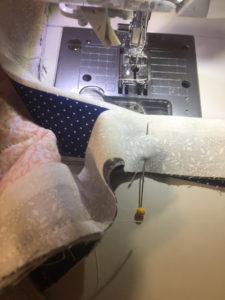
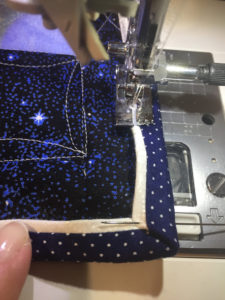
6. Now … this is the fun part! To begin sewing, place the BINDING side of your flange binding to the BACK side of your quilt’s raw edge. Leave the first 4″ or so “loose ” (you will use this part to secure the binding at the end!). Notice in the photo below, I am attaching the flange binding to the BACK of my quilt. The NAVY BINDING side of my flange binding is Facing the Back of my quilt. you can see the White Flange side of the binding facing me as I sew… Make sense? The magic happens when the binding is flipped around to the right side! You’ll see that in a moment!
7. Corners!! How to miter the corners! Here is a photo showing how to do that. When I get 1/4″ away from a corner edge, I simply sew off the quilt at a diagonal to the corner, then I turn my quilt a quarter turn, fold the binding up into the corner even with the top seam and straight down the right side. Then I line up my needle 1/4″ from the right edge and begin sewing down the next side of the quilt.
8. When I’ve sewn all the way around, it is time to match up the two edges of the flange binding and butt them together in a straight seam. Notice (in the photo below left) that I have folded back the flange binding where the two meet and pressed a crease in that location on both ends. My pointer finger is pointing toward that creased area. Then, I use a pin (you could certainly use a marker and mark the creases on both edges of the binding) to mark those two creases which I will match up and sew together in a straight seam. The next photo shows where I’ve placed a pin to indicate the seam line. The third photo shows that seam has been sewn and trimmed; and then I finished sewing the last 6″ or so of the binding to the quilt.
9. Next, I press the Flanged binding away from the back of the quilt so it will easily wrap around the quilt to the front to be sewn down.
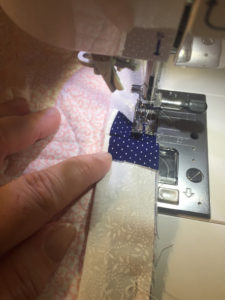
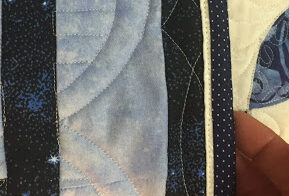
10. Make sure you have the proper color thread in your machine as well as in your bobbin so they will match your Flange fabric for the top of your quilt and the backing fabric for the back. In the photo shown below, you’ll see that the machine is stitching on the flange fabric on the front of the quilt. Mitering the corners can be done by folding the binding at the bottom ‘up’ while folding the binding you are working on ‘to the left’ tucking the bottom binding inside the fold to create a mitered corner. Notice how the “white mitered flange” matches up in the corner,. Also note that if you plan to enter your quilt in a contest, you’ll want to hand-stitch the mitered corners closed. If you look at the closeup photo at the top of this post, you’ll see my mitered corner has NOT been hand-stitched yet…Notice the pucker? That will be eliminated when I hand-stitch the corners closed!
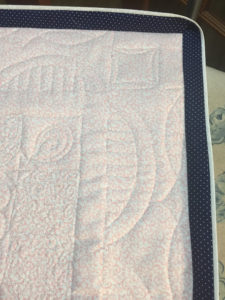
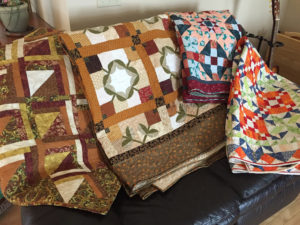
11. Finished Quilt! Once you’ve done a Flanged Binding a few times, you will fall in love with this technique. You’ll have your quilts bound in no time at all with a very professional look as well!
 Have fun with this technique! Let me know if you try it! I’d love to see photos of your finished quilts bound with flange bindings!
Happy Quilting!
Lori