The last step of our Mystery Quilt tutorial involves creating the outside border using a variation of flying geese units (FGU) and Quarter Square Triangles (QST) units. We will use the parts that are trimmed away from the flying geese unit to create our QST’s!
- You will need a total of 32 Flying Geese Units (FGU) for the 4 outside borders of the quilt. You will need 28 Quarter Square Triangle Units (QST) for the outside borders of the quilt. You will need 4 Dark (navy blue is what I used) 3.5″ squares for the 4 corners of the quilt border.
- For the Fllying Geese Units( FGU), I used the light/medium Blue yardage fabric (same as I used for sashing the quilt center). Cut a total of 32 Light/medium rectangles for the FGU’s that measure: 6″ x 3.5″
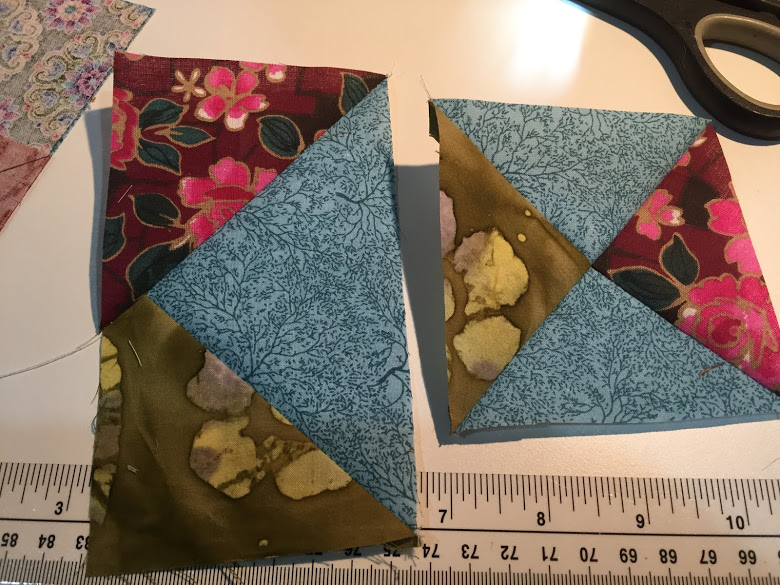
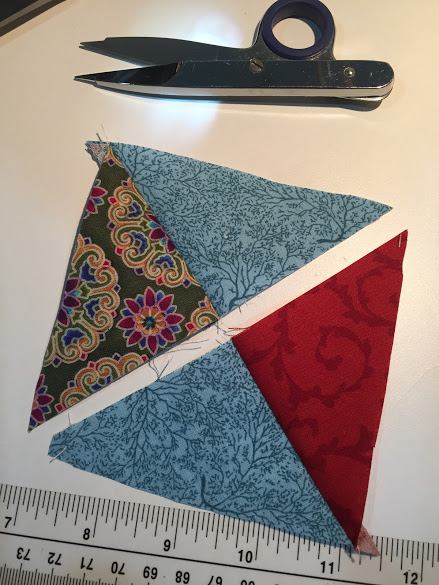
- Also, pull a total of 64 Dark/Bright 3.5″ squares from your stash to create the FGU’s. Place a dark/bright 3.5″ square on the light/medium rectangle; draw a diagonal line. Sew on the line.(Photo below). CAREFULLY trim away the excess leaving a scant 1/4 seam allowance. Do the same on the opposite corner of the rectangle to produce a FGU. You will see (below) that the green 3.5″ square on the left side had already been stitched, trimmed and pressed out. The floral 3.5″ square has been stitched. I’ve carefully trimmed away the excess…which will be used to make our QST’s.
4. Repeat the step above to create a total of 32 FGU’s. SAVE all the trimmed away parts of your FGU’s because they will be sewn together in the next step. Each FGU should measure: 6″ x 3.5″ … check the measurement of all your completed FGU’s!
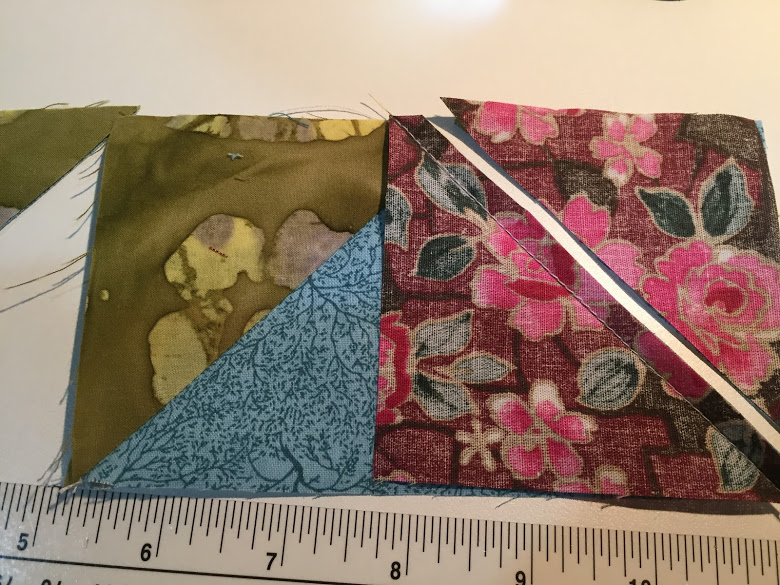
5. In the photo below, you will see the trimmed-away triangle pieces (from the FGU’s) being sewn together to create the two halves of the QST units. The light/medium blue fabric is not visible in the photo because it is underneath the green and the floral triangles as they are being stitched. Each time I sewed an FGU, I immediately created the QST unit using the trimmed away parts. 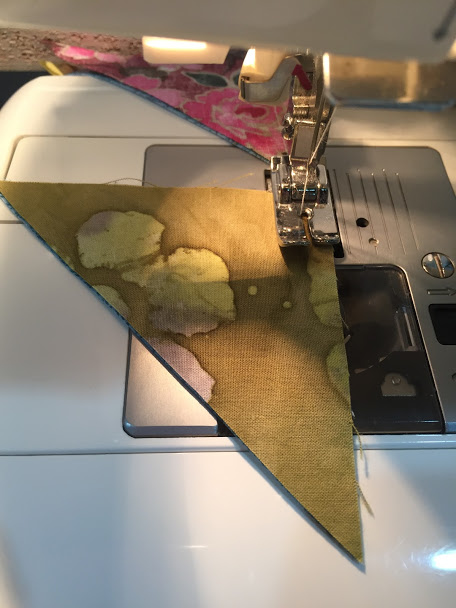
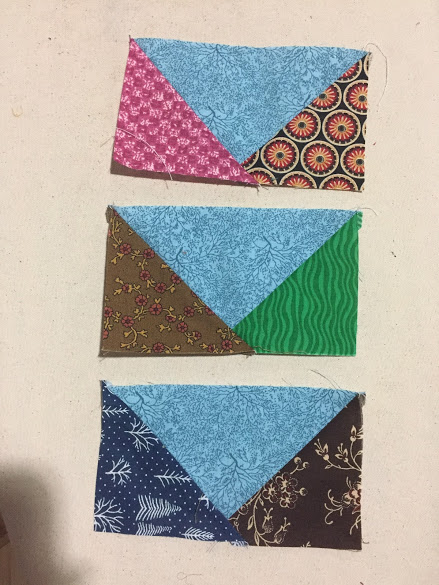
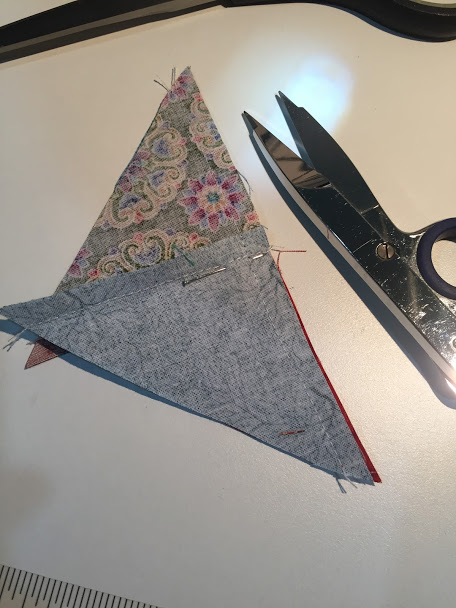
6. The photo below shows what the two halves look like! They will be sewn together to create a QST unit.
7. In the photo below, you’ll see that I placed a pin in the center to ensure the seams lined up perfectly as I stitched the 2 halves together.
8. Once they were sewn together as Quarter Square Triangle Units (QST), I trimmed them to measure 3.5″ square (see photo below).
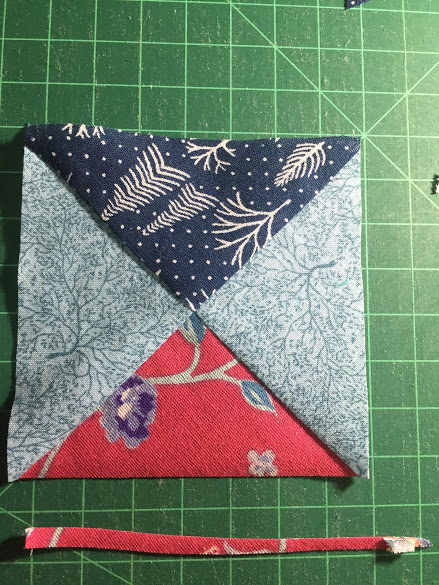
9. Make a total of 28 QST units for the outer borders of your Mystery Quilt and make sure they all measure 3.5″ square.
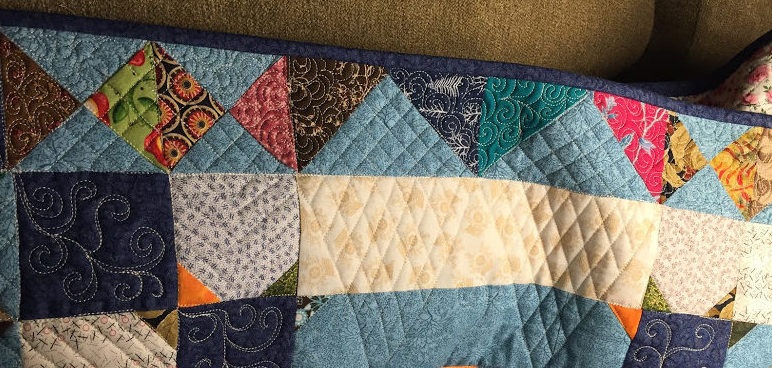
10. Now, let’s put the rows together. Using the photo below as a guide to construct our outside borders, we’ll begin to sew the FGU’s and the QST units together. HOWEVER, make sure the QST units and the FGU’s rotation/direction is as shown in the photo. The “colored” geese of the FGU’s face the outside of the quilt. The “colored” parts of the QST’s do NOT!
11. So, the first 2 outer border rows will go together as follows: QST unit, QST unit, FGU, FGU, QST unit, FGU, FGU, QST unit, FGU, FGU, QST unit, FGU, FGU, QST unit, QST unit. Make two identical rows following this placement.
12. Attach those two rows to opposite sides of your quilt.
13. Last, we will make two outside border rows that include the Dark (navy for me) 3.5″ squares in each of the 4 corners. Sew these last two rows as follows: Dark 3.5″ square, QST unit, QST unit, FGU, FGU, QST unit, FGU, FGU, QST unit, FGU, FGU, QST unit, FGU, FGU, QST unit, QST unit, Dark 3.5″ square. Do this twice and then attach those two rows to your quilt top!
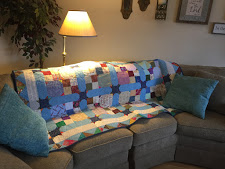
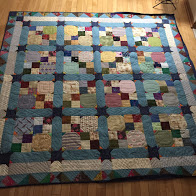
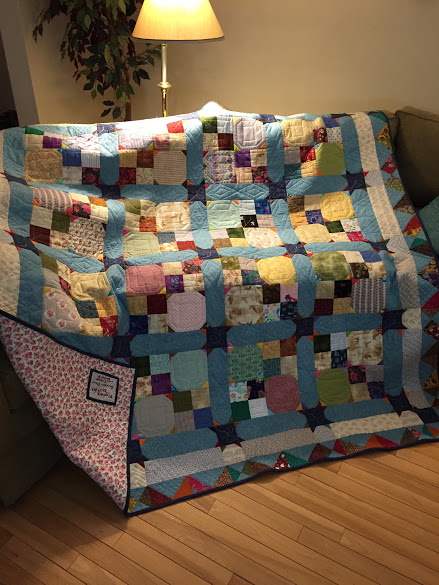
Your quilt top is finished! I would love to see the color options that you chose! Here are a couple photos of mine using my Speedy Solutions Scrap Stash and medium blue and navy blue yardage.
My next Mystery Quilt will soon be out on my website and on Facebook. Again, we will use up our Speedy Solutions Scrap Stash to create another beautiful quilt to enjoy!
Happy Quilting! Lori Dickman