[NOTE: 5/5/20… I learned that there was a problem downloading the PDF Border links due to a broken link… The Links have been FIXED so the PDF’s can now be downloaded for both Mystery Quilts without any issues. The links are found within the instructions for each pattern below.. .If you have any questions, or would like me to email these PDF’s directly to you, please let me know. My email is: quiltingwithlori@gmail.com Thanks & Happy Quilting! Lori]
Quilters: Are you ready to create some great borders for your Mystery Quilts? I have designed two different borders. One is a ‘Braided” border and one is a Triangle border… I love both of them… Have Fun!
NOTE: For both of these borders, you will need to download and print out the appropriate template pieces (see the links included with each set of quilt instructions. When you print out the templates, be sure that you print them to “full scale”… do not allow your printer to change the settings. (For instance, my printer always wants to default to “fit to page” and that will NOT work! The templates must be printed out at 100% or full scale.
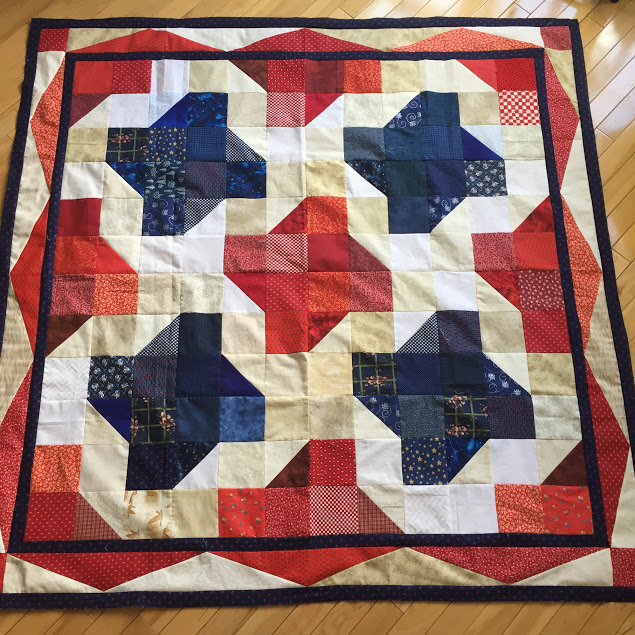
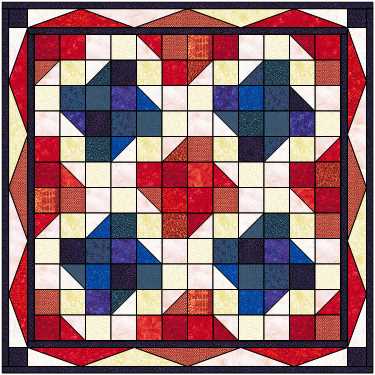
Spinning Attic Windows Mystery Quilt:
The Inner Borders and Outer Borders are simply 1.5″ wide strips. I chose a couple of navy fat quarters to cut those borders, then I pieced them together to create the following:
Inner Navy Border: Qty (2) 1.5′ x 48.5″ and (2) 1.5″ x 50.5″
Outer Navy Border: Qty (2) 1.5″ x 56.5″ and (2) 1.5″ x 58.5″
Also, cut or pull from your stash (4) 3.5″ squares for the corner blocks in the border. (Although the diagram below shows Navy Blue squares, I chose to go with Red squares for my quilt top!)
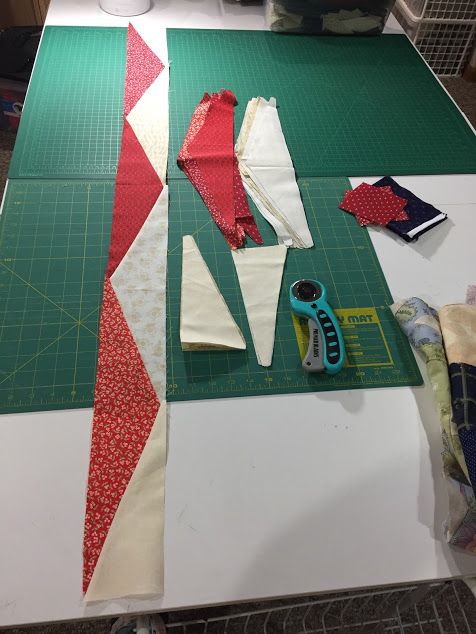
NEXT: Since each of the Large Triangle templates that make up the MIDDLE BORDER are about 17″ in length and 3.5″ in height, I located various “Red” fat quarters which had the required amount of fabric. I found 4 different “Reds” and cut out a total of (12) Red LARGE triangle A Templates.
Note: Those Large Triangle A “templates” -[PDF Links below] – are too large to print on one piece of paper; they must be taped together on the dotted line after being cut out to create the full triangle.
Then, I found creams/lights and cut out a total of (8) of the same LARGE Triangle A templates in Cream/White.
You’ll notice in the photo of the quilt top, there are also (white) “End Unit” Triangles in the middle border… one of those triangles is reversed for each side of the quilt top. These “half-triangles” will be sewn at the ends of each of the borders. There is a template for each … an “End Unit” template and an “End Unit Reversed” template.
At this point, cut out your Light colored End Unit triangle templates … you will need (4) End Unit and (4) End Unit REVERSED.
LINKS FOR ALL TEMPLATES FOR SPINNING ATTIC WINDOWS QUILT ARE AVAILABLE HERE:
PDF: Spinning Attic Windows End Unit A
PDF: Spinning Attic Windows End Unit Reversed
PDF: Spinning Attic Windows Border
Now that you have all the pieces cut out, let’s get them sewn! First, sew the shorter (Navy) 1.5″ x 48.5″ Inner Borders to opposite sides. Then sew the 1.5″ x 50.5″ Inner Borders to the other two sides.
Next, we’ll work on piecing the triangles in the Middle Border. Below you will see a photo which shows hows the End Unit and the red and white Large Triangles are laid out for the border. BE SURE TO USE THE CORRECT END UNIT ON EACH SIDE SO THE ROW LAYS PROPERLY! If you try to line up an “incorrect” End Unit to a Large Triangle, it will be evident that there is a problem! Just swap it out for a “Reverse End Unit.” Just make sure your Border “rows” are actually straight rows without any “elbows” !!! Sewing an incorrect End Unit will create an “elbow” at the end of your Row 🙂
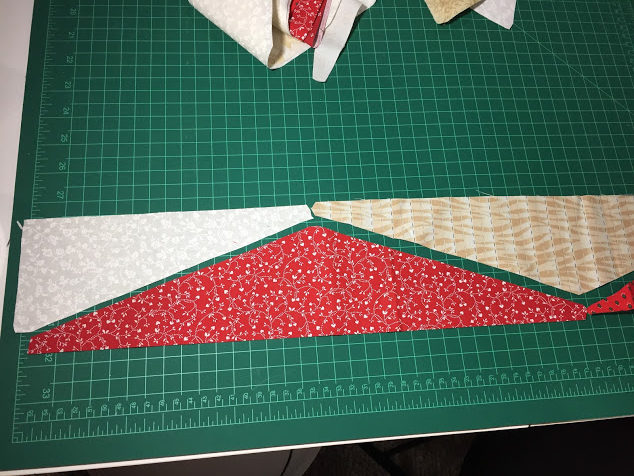
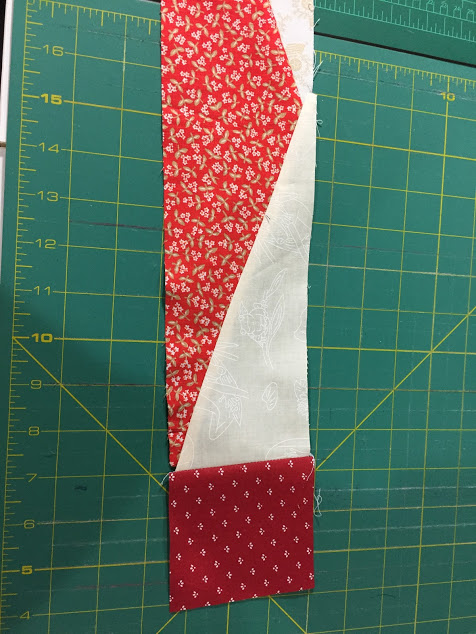
Line up a Light “End Unit” template with a Red “Triangle Template A” and pin. See the photo below… Sew a 1/4″ seam allowance along that long edge.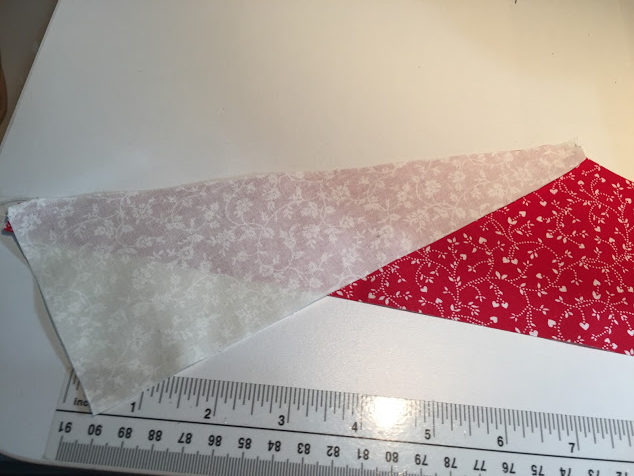
Then press it toward the dark…
Then continue adding the Light and Dark Triangle template A’s across the row (3) Dark (red) and (2) Light (creams). At the end of the row, add the Reverse End Unit to that border row.
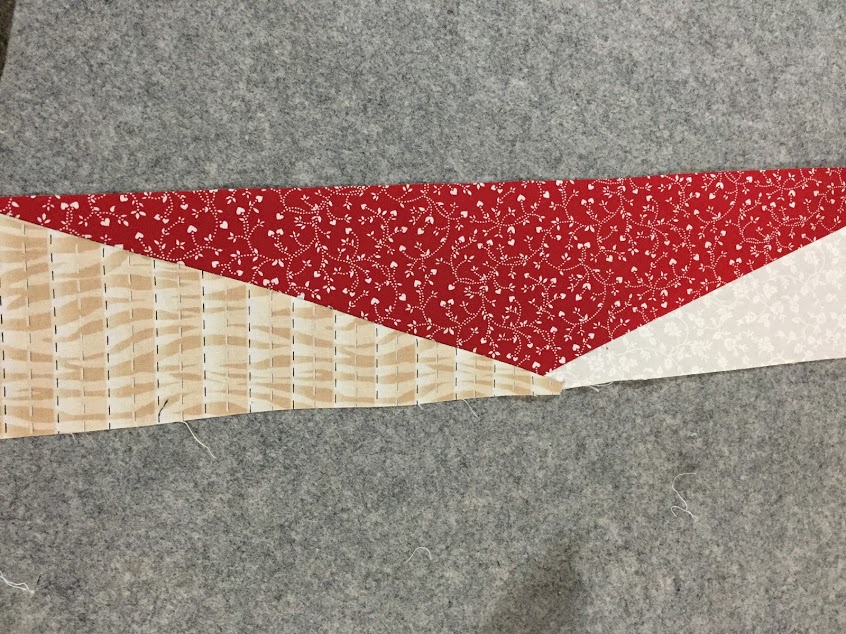
Two border rows will be identical to the photo (ABOVE). You will also need to make two border rows that include the 3.5″ Corner Block on each end. Below is a photo of one end of those two border rows showing the Red 3.5″ block attached to the End Unit Triangles..
Once you have finished piecing all four of your Middle Border rows, you can sew them onto the quilt top… beginning, of course, with the two shorter Middle Border rows (which do NOT include the 3.5″ squares on the ends. Then, sew on the Middle Border rows that include the 3.5″ squares.)
Last, for the Outer Border. Simply sew the (2) 1.5″ x 56.5″ Dark borders onto opposite sides; then sew the (2) 1.5″ x 58.5″ longer Dark borders to the other two sides! Your SPINNING ATTIC Mystery Quilt is ready to be quilted!
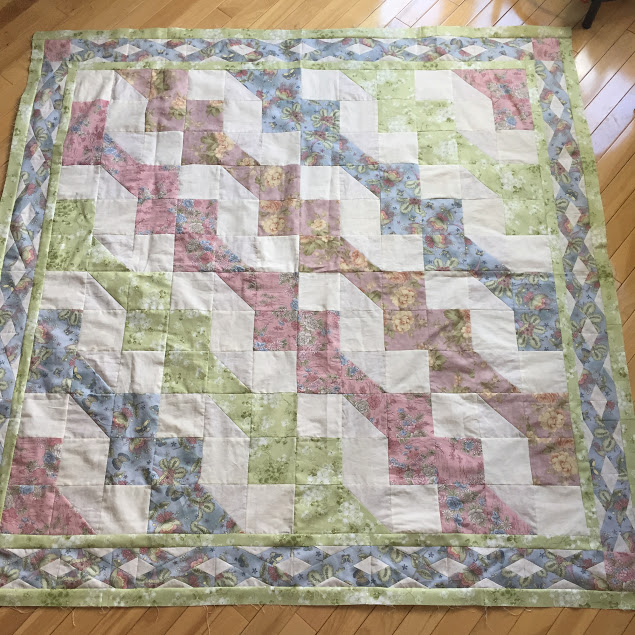
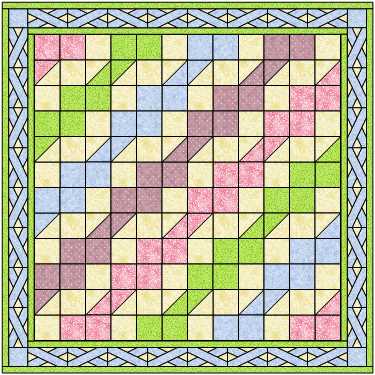
Shades of Spring Mystery Quilt Borders:
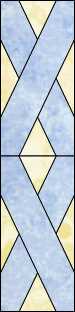
For this quilt, I used a Braided border, although EQ8 calls it “Overlapped snowflake border”… not sure why they call it that… to me it looks more like a Braided border! 🙂
BELOW you will find the link to the 2-page PDF document which includes ALL the templates for the Shades of Spring quilt border. You’ll notice that there are REVERSE templates for each. Again, when you print the document, be sure to print at 100% or full scale. I suggest making plastic templates of each and carefully mark which side is the RIGHT SIDE of EACH of the templates. When you trace and cut the templates from your fabric, ensure that the Right Side of the fabric is the same as the Right Side of the template.
PDF Border Templates for Shades of Spring
NOTE: By tracing, cutting your templates with your fabric folded (RST), you are automatically creating a Right side and a Reverse side of each template. This does save time as you’re not cutting as many ‘single-fold’ tracings and cuttings of your fabric. Use whichever method works best for you.
For my Shades of Spring Borders, I chose to go with Blue and Cream. I really wanted it to be scrappy, like the center of the quilt top; however, I ran out of those fabrics. For this particular quilt, I was using four different floral fabrics and an assortment of creams. My goal was to use up fabrics that I had on hand…so I did!
Have fun with your borders…do something wild and crazy! NOTE that the braided borders are put together in UNITS OF TWO. One of the Braids crosses to the left and the Reverse Template braid crosses to the right. The small “x’s” are also reversed from one another in the two blocks.
Cut (16) of Template A and (16) of Template E. (I cut mine all in blue.)
Cut (16) of Template C and (16) of Template D. (Again, mine are all blue.)
Cut (16) of Template B and (16) of Template F. Mine are Cream!.
Also, cut (4) 3.5″ corner squares… mine are Blue.
Cut (2) 1.5″ x 48.5″ INNER Borders. Cut (2) 1.5″ x 50.5″ INNER Borders (Mine are green)
Cut (2) 1.5″ x 56.5″ OUTER Borders. Cut (2) 1.5″ x 58.5″ OUTER Borders. (Mine are green)
Before we get to piecing our Braided Border rows, let’s attach the INNER borders to our quilt top. Sew the shorter 1.5″ x 48.5″ borders on to opposite sides of the quilt top. Then sew the longer (1.5″ x 50.5″) INNER borders to the other two sides.
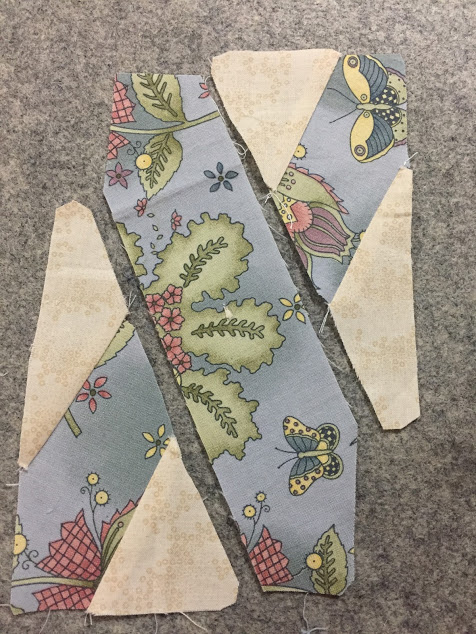
Now, let’s sew those pieces together. First, sew the smaller sections together… sew an “F” to a “C” to a “B”…The photo below shows how the pieces would line up together before being pinned…
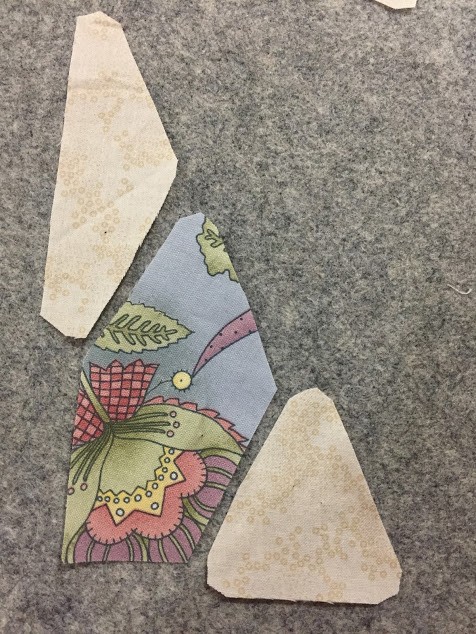
The next photo shows how the pieces should be pinned for sewing.

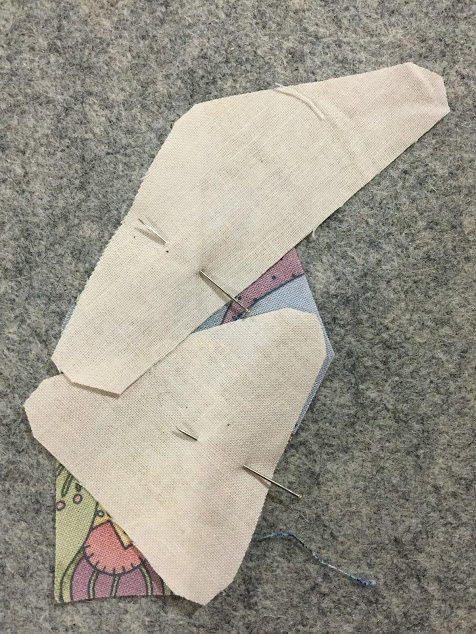
Once pinned, then sew 1/4″ seam allowances. Open and press.
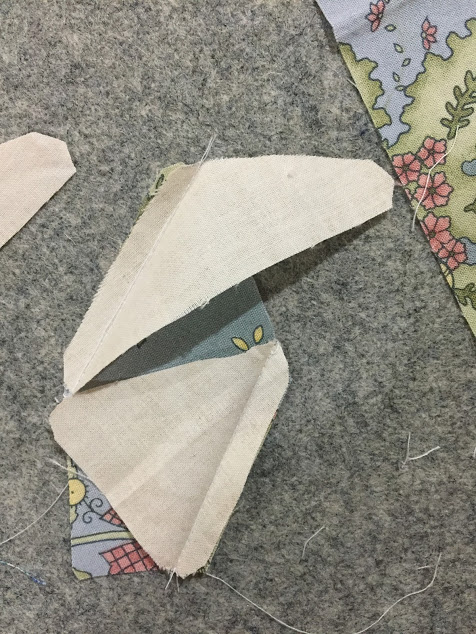

These same steps are done for both sides of the rectangle before sewing each triangular-shaped unit to the long center template.
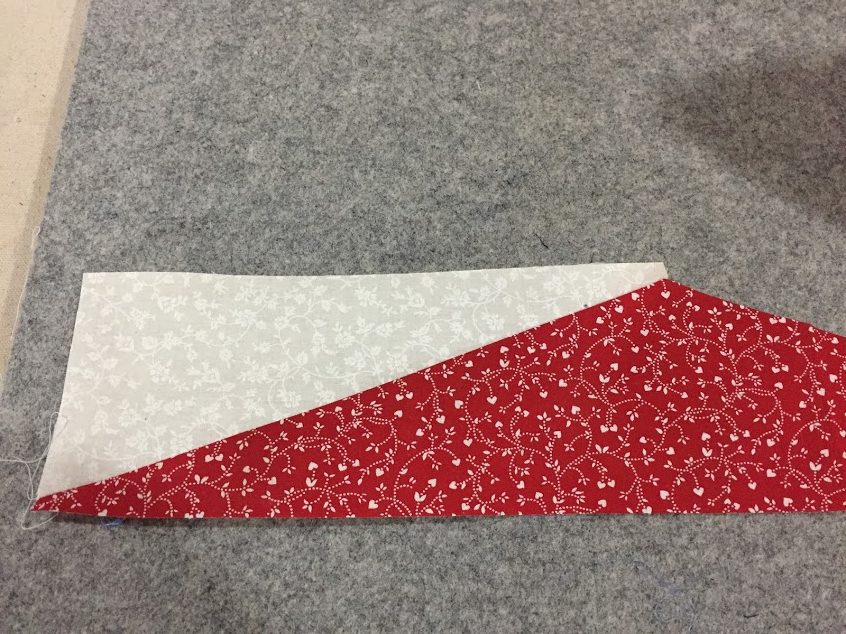
Once the triangular-shaped sides are sewn to the center and pressed, it will look like the following photo. (Note: the photo below was actually taken of the “reverse” block… you’ll see the center long template is slanted to the right instead of to the left as the photos above portray!)
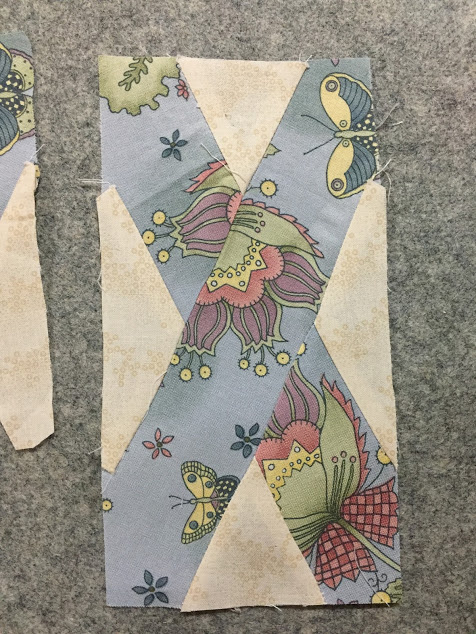
Make a “regular” unit and a “reversed” unit and line up the pair together as shown here to sew them together with a 1/4″ seam allowance.:

Make a total of (4) SETS of these UNITS (photo above) … to make a total of (16) units. Then, sew (4) units together to create (4) braided border rows. Add a 3.5″ corner square to each end of TWO of those braided border rows. Sew the shorter braided border rows on to opposite sides of the quilt first. Then, sew the longer braided border rows (which include the corner squares) onto the other two sides of the quilt.
Last, sew the 1.5″ x 56.5″ OUTER borders to opposite sides of the quilt. Then sew the longer 1.5″ x 58.5″ OUTER borders to the other two sides.
Now that you have the tops pieced, the quilts are ready to be quilted!!!! i’ve attached photos of both of my Mystery Quilt tops… ready to be pressed and placed on my long-arm machine to be quilted!!!