Part Two of the Mystery Quilt pattern, “Snowballed Stars!”…
…involves “snowballing” the four corners of a square piece of fabric! SEW Simple! Let me show you how in this post! This quilt is a great way to use up some of your “Speedy Solutions” scrap stash and create a beautiful quilt in your favorite scrappy color theme!
If you’ve not used my technique to cut up and organize your scrap stash for future beautiful quilts, you will want to check out my book, “Speedy Solutions to Cut & Organize Your Scrap Stash!” Contact me through my website (here) and I will get that book to you for $10 plus $3.00 S&H! The book takes you step by step through the process of cutting up and organizing your scrap stash so that your messy box of wrinkled, unusable scraps turns into an organized, “cut and sorted by value” stash of gorgeous fabrics!!
If you have the chance to hear me Lecture on this very subject and see my Trunk Show of 30+ Scrap quilts, you will see in person how this technique can be done…fast and fun! Talk to your Guild Program Chair person about having me visit your guild this coming year!! (See my Lecture/Workshop link here.)
Now, let’s see what we need to do for Part Two of our Mystery quilt!
- From your 6″ bin of “Light Value” scrap squares, grab 32 6″ Light value squares.
- From your 1.5″ bin of “Medium Value” scrap squares, grab 128 (1.5″) squares.
- On the back side of each of the 1.5″ squares, draw a faint line corner to corner…diagonally…across the square. This line will become your “sew” line as you snowball each corner of the 6″ square..
- Now, line up the 1.5″ squares on each corner of the 6″ square. See the photo here which pictures the 4 little 1.5″ squares (face down) on the right side of my 6″ square in each corner (Fabrics are sewn right sides together – RST). (The lighting in this photo isn’t the best, but I think you can get the idea!) I do not use pins; when I get to the corner that I will sew, I just line up the snowball square perfectly in the corner of the large square. Then, I follow the faint sewing line that I’ve drawn diagonally across the little square. In fact, you will get to the point where you won’t even be drawing the diagonal lines after a few blocks, because your eye will be able to sew a straight line diagonally without the help of the drawn line!.
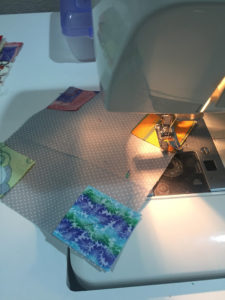
- Once all four 1.5″ squares are sewn diagonally in the corners, I then trim off the outer edge of that snowball triangle leaving a 1/4″ seam allowance.
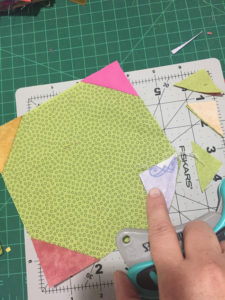
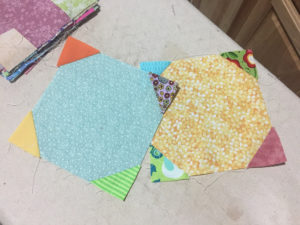
- Then take the blocks to the ironing board and press each of the four corners open. The end result will look like the photo here… This photo shows the small triangles cut away leaving a 1/4″ seam allowance. It also shows the snowballed corners pressed nicely toward the outer edges of the 6″ block.
- Do these same steps to snowball each of the 32 (6″) blocks.
- Here is a photo of a couple of finished Snowballed 6″ blocks.
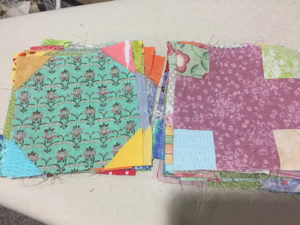
- 9. The photo below shows two stacks of these units… the stack on the left is complete. The stack on the right needs the outer triangle of the snowball trimmed away and then pressed.
The next Step in our Mystery Quilt will be the snowballed Sashings! But, that’s for next time! Have fun with this fast and easy quilt project!
Happy Quilting! Lori Dickman
