This past week, I have been working on a Pixel Quilt design whenever I was not working (telecommuting) or cleaning, or cooking or doing laundry!! This quilt design was made from a photo of my granddaughter, Dani. I am actually still sewing the rows together, but I am getting closer and closer to having this quilt top pieced together so I can get it up on the quilt frame!
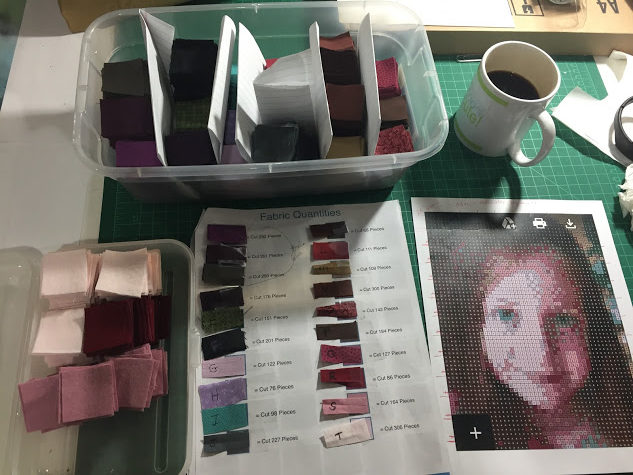
The photo (above) shows the pixelated photo of Dani, along with a portion of the pattern and the 3,450 small (1.5″) fabric squares for the quilt. There is an App that can be loaded on your iPhone or iPad which can grab photos from your photo library to turn them into Pixelated Quilt patterns. The App allows you to choose how many fabrics and how many pieces you want in the pattern to create your quilt. Obviously, the more pieces and fabrics used will create an even more life-like quilt of the photo you’ve chosen!
For my Dani Blue Eyes quilt, I decided I did not want to deal with more than 20 fabrics, and no more than 50 squares across … or 50″ wide. Once I entered those specs into the App, it created the pattern using 3, 450 squares (1.5″ squares) and 140 (5.5″) blocks! Can you IMAGINE! Over 3400 pieces in this quilt top! But it was worth it! Very time-consuming!
Here are some of the steps involved in the process:
- Notice in the photo here that I’ve counted out all my squares and placed them in order in plastic boxes. I have also identified on the corresponding “Key” which fabric was which by taping a small piece of that fabric along with the number of pieces needed and marking the fabric with the appropriate letter (A – T).

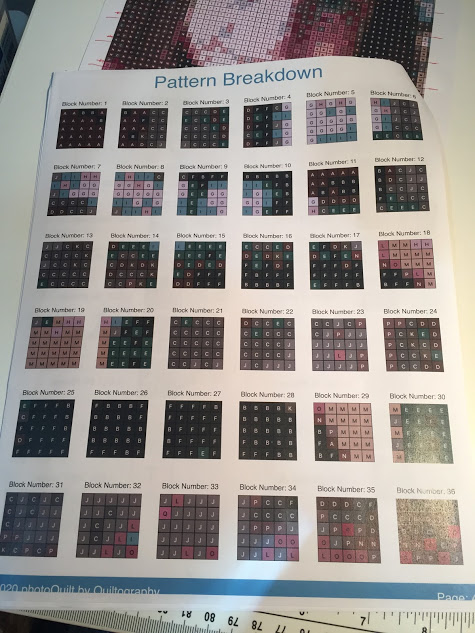
- Then it was time to start sewing the 140 (5.5″) blocks together. The photo here shows how to create each of the (140) 5.5″ blocks for the quilt top. It may be hard to decipher this from the photo below, but each 5.5″ square consists of particular colored fabrics which are identified by a letter … from A to T. The blocks are numbered from Block 1 to Block 140; however, I penciled in identifiers right above each block which helped me place the blocks in rows of 10 blocks by 14 rows. (Block 1-1, Block 1-2 Block 1-3, …. Block 2-1, Block 2-2, Block 2-3, etc…) (See photo in Step 3 for my penciled-in identifiers!)
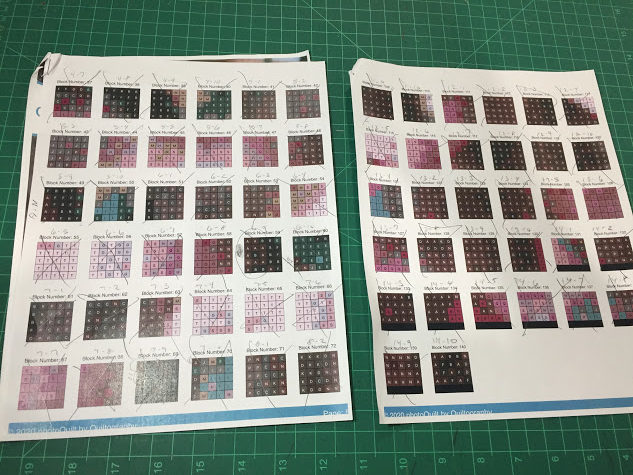
- As I pieced each block together, i would cross off that specific block and begin the next block. In the photo below, you can see my Block Identifiers and my pencil marks where I crossed off blocks as I completed them. NOTE: The photo below ONLY shows Two of the Four pages of blocks that I had to sew together to create this quilt!!!
- As I worked on each little 5.5″ block, I used the “web” method of sewing them together. This method really helps to keep the right square in the correct position within the little block. I would lay out the 25 (1.5″) squares in their correct order next to my sewing machine. (See photo below).

- Then, I would pick up square 1 and square 2 from row one and sew them together. Then onto to square 1 and square 2 from row two, etc…(See photos below.) You’ll notice (photo below) that each little square is ‘webbed” to the next with the thread as I sewed them assembly-line fashion.)

- Here is the pieced block of 25 squares as I finished sewing it together. It has not yet been pressed.

- Once I pressed each little 5.5″ block, I then would square it up to ensure it measured 5.5″. (I see that the photo I used below to describe this step is one which shows a rather messy pressing job!!! LOL) Then I used a fine point permanent marker and wrote on the inside top “seam allowance” of each block the appropriate “Identifier number” (i.e. 1-5 in the seam allowance below indicates it is Block number 5 in the 1st row of the quilt. The arrow indicates the top of the block.) This was VERY helpful when sewing all the blocks together to ensure that each of the 140 blocks were sewn in their proper position within the quilt. It is important to keep this information written ONLY within the SEAM ALLOWANCE so the writing does not show through to the right side of the quilt when finished.

- Now, let’s take a peek at the quilt top as I pieced each block and placed them on my design wall in my quilt studio. It was fun to see how Dani’s little face started to appear on the quilt! The first photo below shows the top of her head and forehead.

The second photo below shows the quilt down to her chin…

…the third photo (below) shows the quilt down to her neck area…
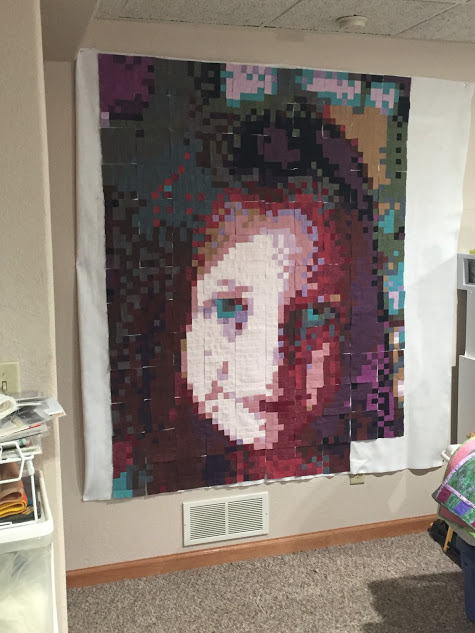
And this 4th photo (below) includes 13 of the 14 rows for the quilt… I ran out of room on my design wall! So, once I pieced the 14th row together, I immediately started sewing the rows together from the bottom of the quilt.

Please note that the quilt blocks shown in the photos above are still NOT PIECED together in rows yet. The blocks are simply stuck up there on the design wall waiting for me to sew them together! (In many cases you can see the ‘white’ design wall showing through between blocks.) When I get all the rows of the entire top pieced together, I will update this post with that photo! Then the pieced quilt top will be ready for the quilt frame!
If you’ve never tried a pixel quilt, I encourage you to do so! They are really fun …. very time-consuming, but really fun to see the “photo” when you’re finished!
Happy Quilting! Lori Dickman
