For this step of the Mystery Quilt tutorial, we will be working on the inside border. This border uses the following pieces:
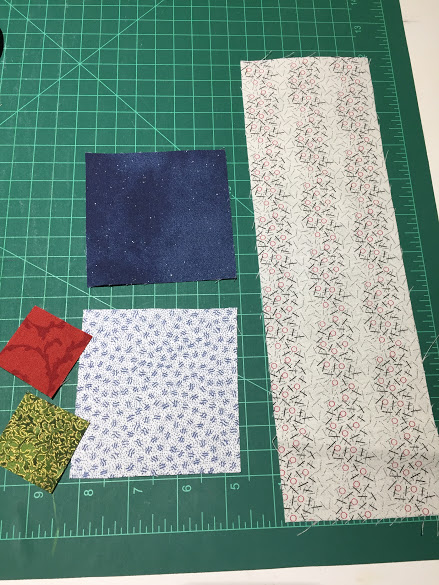
A. 3.5″ x 11.5″ rectangles in very Light values (qty: of 16 Light rectangles)
B. 3.5″ squares in darks (I’m using navy blue squares as I did in Step Four (qty of 4… one for each corner of the quilt border)
C. 3.5″ squares in Light values (qty of 20)
D. 1.5″ squares in Brights (qty of 40)
First, let’s “snowball” our 3.5″ Light squares on ONE SIDE ONLY. We’ll snowball just 2 corners instead of all 4 corners. See the photo.below. I have placed the 1.5″ Bright squares RST on the top 2 corners of the 3.5″ Light square. I drew a diagonal line across the 1.5″ square… this become my sewing line. Once it is stitched, I will trim away the excess leaving a 1/4″ sea allowance. Press away from the Light square.
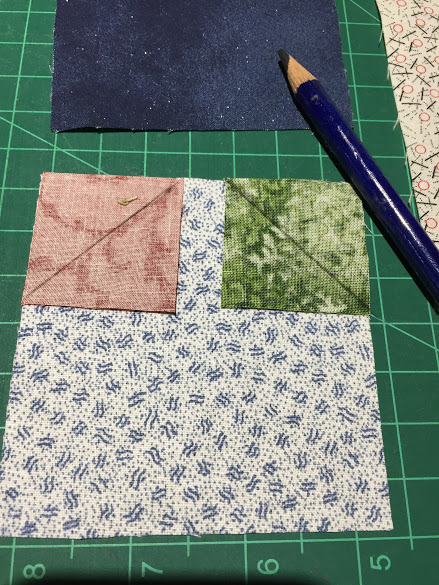
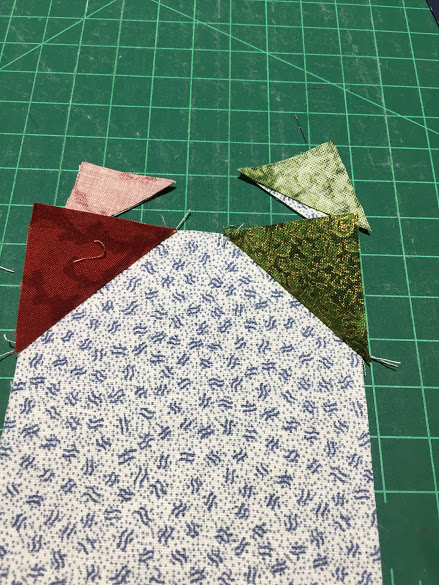
Snowball all 20 Light 3.5″ squares with (2) 1.5″ bright squares.
Next, we will construct the two short border rows by sewing (4) 3.5″ Lights to (4) 3.5″x11.5″ Light rectangles. (I tried to make sure that the various lights were not placed next to one another… I kept it as scrappy as possible.) I realized as I was writing the instructions for this border that I neglected to take photos as I was making the quilt top! So, I’ve cropped out a bit of this border so you can see how I’ve put it together.

IMPORTANT: Notice that the Snowballed 3.5″ Light squares ALL FACE up toward the DARK NAVY 3.5″ in the previous row. This is creating a STAR around the Navy Blue 3.5″ squares.
For the two shorter rows of the quilt top, I sewed the pieces in the following order (Making sure the snowballed light squares were all facing up in the same direction):
Light 3.5″ square, Light 3.5″ x 11.5″ rectangle, Light 3.5″ square, Light 3.5″ x 11.5″ rectangle…. until I used (4) of the Light squares and (4) of the Light rectangles for each of the two shorter rows.
Now. sew those two rows to the quilt top on opposite sides.
Next, we’ll construct two longer border rows. This is done by adding a Dark 3.5″ square (Navy Blue is what I used in my quilt top) at the beginning and at the end of the row. So, the longer two rows are sewn as follows:
Dark 3.5″ square; Light 3.5″ square, Light 3.5″x11.5″ rectangle; Light 3.5″ square, Light 3.5″x 11.5″ rectangle….until I used (4) of the Light squares and (4) of the Light rectangles… ending by adding a Dark 3.5″ square.
Make Two of these rows which include the Dark squares at the beginning and end of the rows.
Attach those last two rows to your quilt!
We are on the home stretch now, Ladies! One more border to go!
Hope you are all enjoying the Mystery Quilt!! Stay tuned for the last Step!
Lori Dickman
