Every quilter must have a stash of great tools in her toolbox. (It’s only right, eh? Since our husbands have every tool imaginable in their toolboxes?
One of the tools that I really enjoy using…it makes cutting and piecing quilts sooo much easier!!… is the Tri Recs Tools. I purchased the set in 2016 when I went on the Quilting Cruise with Stitchin’ Haven Quilt Tours on the Royal Caribbean. One of the quilt tops we made during the cruise used this set of tools. I LOVE how easy it is to use them to make rows and rows of DIAMONDS! However, this set can also be used to make STAR POINT TRIANGLES!
Since I love stars in quilts and use them quite frequently, the Tri Recs Tool has come in very handy! The tool can cut Star Point Unit sets from 1.5″ tall up to 6.5″ tall. It is very versatile!
Let me show you step by step how I use the tool. I’ll include photos with each step.
Step 1. Cut strips of fabric according to the height of the UNFINISHED triangle. [Or, cut from appropriate size squares of fabric, if you’re using my “Speedy Solutions Scrap Techniques” of storing your scraps!] Your pattern will let you know what size units you are to cut.
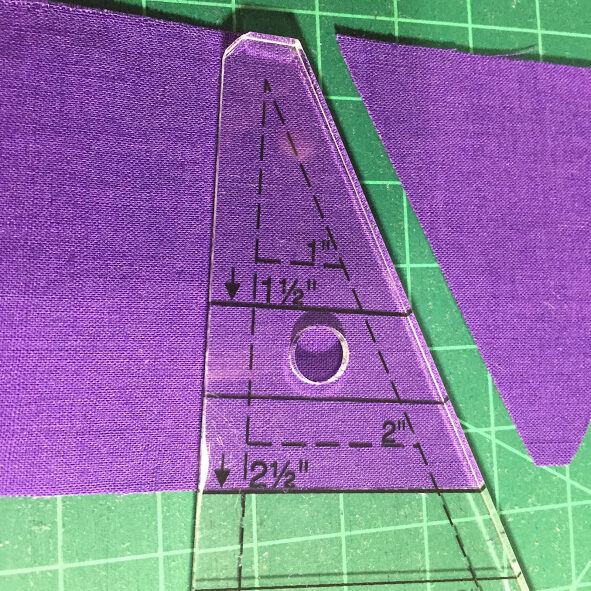
The first tool I am using is the Tri Tool. In the photo below, I’m using plain purple fabric for the Triangle portion, or the background, of this unit. With the “Tri Tool” I am cutting 2.5″ background fabric triangles. (To create the two Star Points, the “Recs Tool” is used. I will show you how the Recs Tool is used in Step 2.)

So, in the photo above, the purple fabric will be the background. The strips of fabric from which I am cutting the Triangles are 2.5″. Note that the triangle portion of the Tri Tool is placed evenly on the strip of fabric with the “flat” top piece of the triangle at the top of the strip, and the bottom of the triangle is even with the bottom of the strip of fabric. The little flat piece at the top of the Tri Tool is the Ruler’s helpful way to eliminate bulk as you are piecing your blocks together.

Step 2. Using the Tri Tool to cut the Triangles: You will cut on each side of the Tri Tool to obtain your triangle. By flipping the Tri Tool, you can continue cutting additional triangles across the strip (if you are working from Strips of fabric).


Step 3. Now it is time to use the Recs Tool to cut the corresponding Star Points.
Note: Each Triangle MUST have Points which are in the REVERSE IMAGE in order for them to fit properly on each side of the Triangle… Especially if the Triangle points are cut from a PRINT fabric!
When using plain fabric (such as the purple fabric in the photo), the fabric is reversible and can be turned to the back side to fit either the right or the left side of the triangle. However, let’s look at fabric that has a print to see the importance of cutting the Recs Points in the reverse image….


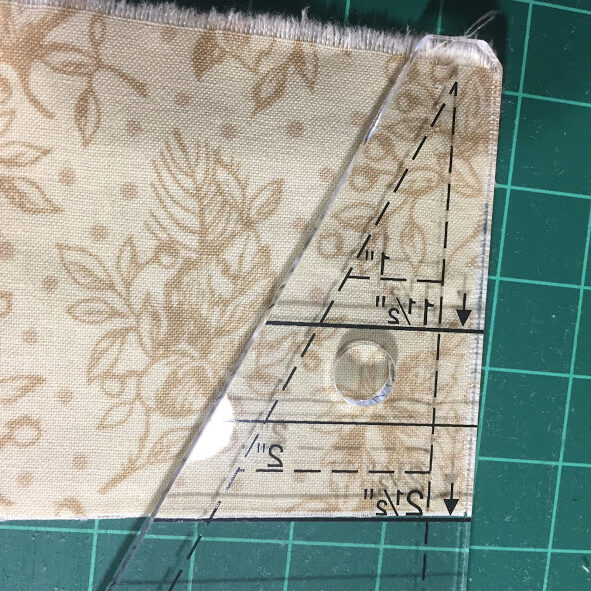
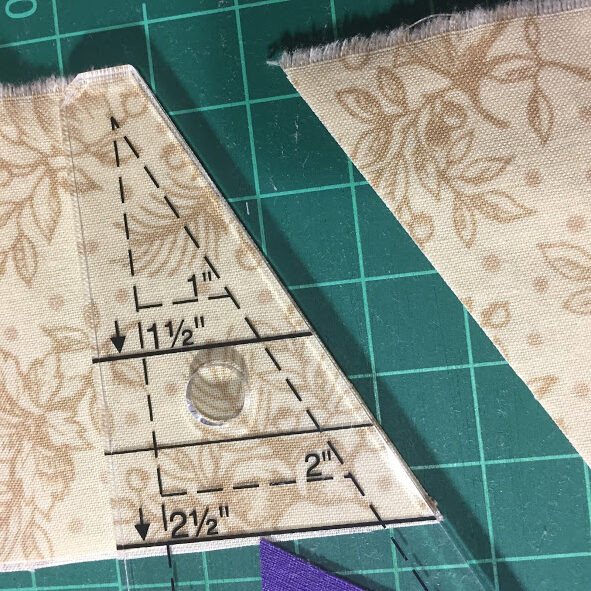
[In the photos to above, the Star Points are being cut from a printed fabric in a light value. I used light printed fabric here to help you ‘see‘ the numbers & markings on the Recs Tool better.]
NOTE: With fabric that is has a print of any sort, it is imperative that you flip the Recs Tool to cut both the Right side and the Left side for the Star Points. See how the numbers on the Recs Tool in the right hand photo here are ‘backward?’ That is important. For every Triangle you cut, you must also have a corresponding “Left” and a “Right” Star Point for that Triangle. The photo on the left shows the Recs tool’s marking clearly readable; therefore, that Star Point will be in the reverse image of the Star Point in the right photo..
You can continue cutting the Star Points across the 2.5″ strip of fabric using the Recs Tool by flipping the tool in order to obtain both Right Side Star Points and Left Side Star Points.


Step 4: Next, you will sew the Star Points to the Triangle. In the photo above, my Star Points are Purple, the Triangle is a light cream color. Once the scant 1/4″ seam has been sewn onto one side of the Triangle, finger press it open. (See photo on far left.)

Then grab the Reverse Star Point and sew it down on the other side of the Triangle in the same fashion. In the photo here, the 2nd purple Star Point has been placed on the Triangle so I can begin sewing the scant 1/4″ seam down that second side of the triangle.
 After sewing those 2 seams and finger-pressing them open, you can see the Star points on each side of the triangle. Now it’s time to square up that unit to the proper size. In this case it would be a 2.5″ unfinished unit.

My little 2.5″ square up ruler fits nicely over the unit. I can trim away the top purple ‘ears’ and any unevenness around each side of the unit.
I now have a perfectly square Star Point unit to include in my quilt!

In the photo at the left, I have sewn two Star Point units together…a row of these units could make a great accent border on a quilt.
Notice that each of the Star Point Triangle units are reverse in color… And, very important, there are 1/4″ seam allowances available above & below the Star Points (top & bottom) in order to be able to properly sew the units to corresponding pieces and still have the Points remain in tact!!
The Tri Recs Tool is a great set of rulers to use to create perfect Star Point Units! I hope you enjoy this method of cutting perfect Star Points units quickly and easily using these templates!
Happy Quilting!
Lori Dickman

